Server Details
Server Configuration
New Features
Items and dynamics from newer versions have been implemented to improve the gameplay experience.
Server Type
This is a Full-Stat server designed for long-term gameplay with balanced competitive progression. Stats are preserved after reset, creating a fair and sustainable environment.
Server is NOT Pay-to-Win. The real difficulty lies in obtaining and improving items. VIP benefits only provide convenience, not power advantages.
Experience System
Base Experience Rates
Master Level System
Master Level (ML) activates when you reach 50 resets.
First 200 ML: approximately 30 days
Next 200 ML: approximately 60 days
Master Experience rates will be increased at specific dates as the server progresses to maintain balanced gameplay.
Party Bonus Experience
| Party Size | Same Classes | Different Classes |
|---|---|---|
| 2 Players | EXP% + x% | EXP% + x% |
| 3 Players | EXP% + x% | EXP% + x% |
| 4 Players | EXP% + x% | EXP% + x% |
| 5 Players | EXP% + x% | EXP% + x% |
Party Tips
Class Diversity
Form party with different character classes to maximize experience bonus.
Stay Together
Keep party members close to share experience effectively in the same map.
Level Balance
Party members should have similar levels for optimal experience distribution.
Support Classes
Having support classes like Elf or Summoner makes leveling faster and safer.
Important Notes
Party bonuses stack with server rates and VIP bonuses for maximum efficiency.
Playing in party not only increases experience but also makes the game more enjoyable!
Approximately 1 reset per day until 50 resets. After that, 2 resets per day become possible with events like Blood Castle and Devil Square.
Reset System
Reset Configuration
How Reset Works
Your stats are NOT lost when you reset. All your stat points remain intact, allowing for continuous character progression.
You can perform a maximum of 7 resets per week until you reach reset 50. This ensures balanced progression for all players.
Once you reach reset 50, the weekly limit is removed and you can reset freely without restrictions.
Punto Ligas (PL) System
Starting from Reset 50, you will earn 1500 Punto Ligas (PL) with each reset.
Punto Ligas are the main currency for purchasing items and upgrades in the xShop.
Grand Reset System
You must reach Reset 100 to perform a Grand Reset.
After performing a Grand Reset, you will return to Reset 60 and can continue earning rewards and progressing.
Grand Reset allows you to continue accumulating Punto Ligas and maintain your character's progression cycle.
Reset Tips
Save Zen
Make sure you have 50M Zen before attempting to reset your character.
Plan Your Resets
Use your 7 weekly resets strategically to maximize progression.
Reach Reset 50
Focus on reaching reset 50 to unlock unlimited resets and start earning PL.
Stats Stack
Remember that your stats accumulate with each reset, making you stronger.
General Drop Rates
Base Drop Rate
Jewel Drop Rates
| Jewel | Mob Level | Drop Rate |
|---|---|---|
| Jewel of Bless | 72 ~ 150 | 0.01% |
| Jewel of Soul | 72 ~ 150 | 0.01% |
| Jewel of Chaos | 65 ~ 150 | 0.015% |
| Jewel of Life | 84 ~ 150 | 0.01% |
| Jewel of Creation | 84 ~ 150 | 0.008% |
Potion Drop Rates
| Potion | Mob Level | Drop Rate |
|---|---|---|
| Potion Horse | 84 ~ 150 | 0.05% |
| Potion Raven | 84 ~ 150 | 0.05% |
Special Items
| Item | Mob Level | Drop Rate |
|---|---|---|
| Lucky Coin | 72 ~ 150 | 0.02% |
| Cherry Blossom White | 72 ~ 150 | 0.03% |
| Cherry Blossom Red | 72 ~ 150 | 0.025% |
| Cherry Blossom Gold | 72 ~ 150 | 0.02% |
Wings & Mix Items
| Item | Mob Level | Drop Rate | Maps |
|---|---|---|---|
| Crest of Monarch | 75 ~ 150 | 0.015% | Kanturu & Icarus |
| Loch's Feather | 75 ~ 150 | 0.015% | Icarus |
| Item Mix 2.5 | 80 ~ 150 | 0.01% | Icarus 2 |
| Flame of Condor | 85 ~ 150 | 0.008% | Icarus 3 |
Important Notes
The base 20% drop rate applies to common items. Rare items like jewels have their own specific drop rates as shown above.
Items only drop from monsters within the specified level range.
VIP players may receive a drop rate upgrade; this will be communicated when the VIP benefits are known.
Rate Upgrade Item
Upgrade Availability Schedule
Item upgrades are unlocked in phases to maintain server balance and fair PvP progression.
| Time Period | Maximum Upgrade | Status |
|---|---|---|
| Days 1 - 60 | +11 | Active |
| Days 61 - 90 | +12 | Unlocks Day 61 |
| After Day 90 | +13 | Unlocks Day 91+ |
Jewel Rate
| Rates | NO VIP | VIP 1 | VIP 2 | VIP 3 |
|---|---|---|---|---|
| Jewel of Soul | 75% | 80% | 85% | 90% |
| Jewel of Life | 75% | 80% | 85% | 90% |
| Jewel of Harmony | 50% | 55% | 60% | 65% |
| 380 Purple Option | 35% | 40% | 45% | 50% |
Chaos Machine Upgrade Rate
| Upgrade Level | NO VIP | VIP 1 | VIP 2 | VIP 3 |
|---|---|---|---|---|
| Item +10 | 75% | 80% | 85% | 90% |
| Item +11 | 70% | 75% | 80% | 85% |
| Item +12 | 50% | 55% | 60% | 65% |
| Item +13 | 45% | 50% | 55% | 60% |
| Item +14 | 40% | 45% | 50% | 55% |
| Item +15 | 35% | 40% | 45% | 50% |
Wings Combination Rates
| Wing Level | NO VIP | VIP 1 | VIP 2 | VIP 3 |
|---|---|---|---|---|
| Chaos Weapon | 100% | 100% | 100% | 100% |
| Wings Level 1 (S1) | 85% | 90% | 95% | 100% |
| Wings Level 2 (S2) | 70% | 75% | 80% | 85% |
| Condor Feather | 50% | 55% | 60% | 65% |
| Wings Level 3 (S3) | 50% | 55% | 60% | 65% |
Fenrir Pet Combinations
| Fenrir Mix | NO VIP | VIP 1 | VIP 2 | VIP 3 |
|---|---|---|---|---|
| Fenrir & Parts | 45% | 50% | 55% | 60% |
Tips & Recommendations
Use Jewel of Luck
Always apply Jewel of Luck before attempting upgrades to increase your success rate.
VIP Benefits
VIP members receive bonus success rates on all chaos machine combinations. VIP 3 offers the highest rates with up to +15% bonus on most combinations.
Wait for Unlocks
Be patient and wait for higher upgrade levels to unlock for balanced server progression.
Important Notes
Fruit creation via Chaos Machine is currently DISABLED on this server.
Final success rate = Base Rate + Luck Bonus + VIP Bonus (if applicable). Rates shown are maximum possible values.
Higher level upgrades require more Zen and jewels. Plan your resources carefully before attempting combinations.
Invasions

Pouch of Blessing
Lorencia
Fire Flame Ghost
Noria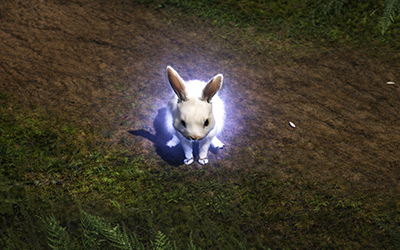
Lunar Rabbits
Devias
Chicken
Elbeland
Snakes
Dungeon
Goblin
Losttower - Atlans - Tarkan - Aida


Events

Blood Castle
Level 15+Enter the Blood Castle and defeat waves of monsters to reach the Archangel. Protect the statue and claim valuable rewards!

Devil Square
Level 15+Survive endless waves of mobs, level up, and obtain items that would cost you more elsewhere!

Chaos Castle
Level 15+Survival PvP arena! Be the last one standing against monsters and other players. Fall off the platform and you're out!

Illusion Temple
Level 220+Team-based capture the flag event! Work together to claim the Sacred Statue and bring it to your altar before the enemy team!
Entry Requirements:
- Illusion Temple Invitation (from NPC or drops)
- Level 220+ (varies by temple level)
- Auto-balanced teams (5vs5)
Rewards
- Illusion Temple Points (exchange for items)
- Blood Fang, Crest of Monarch
- Gemstones and special materials
Commands
Character Commands
Stats Commands
Communication Commands
Server Commands
Coin System
Davion Coins
Premium CurrencyDavion Coins are our server's premium currency. These coins can be obtained through donations and give you access to exclusive items and in-game benefits.
How to get Davion Coins?
Donations
Support the server and receive Davion Coins instantly. Visit our Donation section for more information on donation packages, payment methods and special offers.
Go to DonationLeague Points
Earned In-GameLeague Points are obtained through various in-game activities. Use them to buy powerful items and upgrades!
How to get League Points?
Character Resets
Starting from 50 resets, you will get 1,500 League Points for each additional reset you perform.
Invasions
Participate in server invasions and defeat monsters to earn League Points.
| Monster | Location | League Points |
|---|---|---|
| Pouch of Blessing | Lorencia | +50 |
| Fire Flame Ghost | Noria | +50 |
| Lunar Rabbits | Devias | +50 |
| Chicken | Elbeland | +50 |
| Snakes | Dungeon | +50 |
| Goblin | Multiple Locations | +100 |
Mini Bosses
Defeat powerful mini bosses to get higher League Points rewards.
| Boss | Location | League Points |
|---|---|---|
| Death King | Lorencia | +300 |
| Cursed King | Noria | +300 |
| White Wizard | Devias | +300 |
| Red Dragon | Elbeland | +500 |
World Bosses
Challenge the most powerful bosses in the game to get huge League Points rewards.
Earn up to 1,000+ League Points per boss!
Server Events
Castle Siege
Participate in the epic Castle Siege event and earn League Points based on your guild's performance.
Tournament
Compete in PvP tournaments and earn League Points as a reward. Show your skills and climb the rankings!
Best Rewards AvailableGoblin Points
Time RewardsGoblin Points are earned simply by being online and active in the game. The more you play, the more points you accumulate!
How to get Goblin Points?
Online Time
Earn Goblin Points automatically based on your online time. Stay active and watch your points grow!
Invasions
Participate in server invasions and defeat monsters to earn additional Goblin Points.
| Monster | Location | Goblin Points |
|---|---|---|
| Pouch of Blessing | Lorencia | +25 |
| Fire Flame Ghost | Noria | +25 |
| Lunar Rabbits | Devias | +25 |
| Chicken | Elbeland | +25 |
| Snakes | Dungeon | +25 |
| Goblin | Multiple Locations | +50 |
Mini Bosses
Defeat mini bosses to get bonus Goblin Points.
| Boss | Location | Goblin Points |
|---|---|---|
| Death King | Lorencia | +150 |
| Cursed King | Noria | +150 |
| White Wizard | Devias | +150 |
| Red Dragon | Elbeland | +250 |
World Bosses
Challenge world bosses to get significant Goblin Points rewards.
Earn up to 500+ Goblin Points per boss!
Black Market
Trading Regulations
Official Trading Channel
Official Trading Channel
The only official channel available for trading items, accounts and services is our WhatsApp group. Any exchange made outside this channel is not protected by the server rules.
Join WhatsApp Group
Click the button below to join our official trading community. Buy, sell and trade safely with other players!
Join WhatsApp GroupSecurity Guidelines
Verify Sellers
Always verify the seller's identity before completing any transaction.
Use Intermediary
For high-value exchanges, request an official staff intermediary.
Save Evidence
Take screenshots of all agreements and commercial exchanges.
Report Scams
Report any suspicious activity or scam attempt to staff immediately.
Important Notice
- Server staff will NEVER ask for your password or personal information
- Exchanges outside the official WhatsApp channel are NOT PROTECTED by server rules
- Always use the official trading channel to ensure your safety
- Scammers will be permanently banned from the server
What Can Be Traded?
Socket Weapons Creation
Socket Weapon System Overview
Starting from version eX701, powerful socket weapons were introduced. These weapons are created by combining a base weapon (+11+16), monster materials, combination notes (from League Points), and jewels in the Chaos Machine.
Created socket weapons will have 2-3 sockets randomly. All combination notes are obtained exclusively through League Points.


Archangel Weapons Creation & Upgrade
Archangel Weapon System Overview
Archangel weapons are legendary items created using Loch's of Archangel materials dropped in Blood Castle. Create Divine Archangel weapons first, then upgrade them to Blessed status for even greater power.
Stage 1: Create Divine Archangel (10 Bless + 10 Soul + 1 Chaos + Loch's)
Stage 2: Upgrade to Blessed Archangel (Divine weapon + upgrade materials)


Blood Angel Creation & Upgrade
Blood Angel System Overview
The Blood Angel system involves creating Ancient Hero's Soul, transforming it into Blood Angel gear, and upgrading through multiple tiers: Blood Angel → Dark Angel → Holy Angel.
Ancient Hero's Soul Creation
Ancient Hero's Soul is the essential base material required to create Blood Angel items. It's obtained by sacrificing Ancient Set items in the Chaos Machine.
Creation Formula

Ancient Item
+11 to +16
(Example: Vicious Armor)

Ancient Hero's Soul
80% Success Rate
Only the following Ancient sets can be used to create Ancient Hero's Soul:
• Vicious • Hyon • Anubis • Enis
• Gywen • Aruan • Gaion • Muren
• Broy • Agnis • Semeden • Crono
• Vega • Chamer
Upgrade Level: The Ancient item must be upgraded to +11, +12, +13, +14, +15, or +16 before it can be used.
Success Rate: There is an 80% chance of successfully creating Ancient Hero's Soul. On failure, the Ancient item is lost.
Mix Location: Use the Chaos Machine to perform this combination.